Modelling the Fences For The Foundry

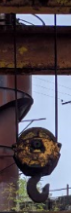
Looking at my reference images there were a lot of different types of fences that were around. Using my beams as the scale factor, I created these fences.

The above images would be the fences that surround the walkways on the top sections of the foundry.

These screenshots are of fences that would surround a perimeter on the ground.

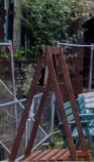
These screenshots are of a bespoke platform that would be used to move from the walkways down to the ground.

Modelling Unique Pieces For The Foundry

After looking at the reference images I noticed that there were some unique pieces that needed to be created. These are the ones that I have made.

And this is what I made.

UV Mapping and Different Map Files for Texturing

To make the models as good as possible, I spent a few hours learning how to properly map the UV using UVLayout. Here I can seperate each piece and map the object how I want to.

I then got the appropriate maps ready to texture in substance painter.

Modelling The Foundry – Part 1

Using the reference images I have started work on building components for the foundry. This includes; support beams, stairs, hand rails and the hand rail supports.

Modelling The Foundry – Control Board

After learning all of the techniques I needed, I now started on creating the components that would make up the foundry of the building. Looking through the reference images we have, I decided to start on the control board.

The following are some closer screenshots of each component, with each having their wire frames included.

Modelling Chess Pieces

As a way of remembering some of the techniques that I learned, I decided to create some chess pieces.

Improving The Driver Cart

After learning some new techniques modelling my bench, I then used these techniques to re-create the driver cart.

Having this model, I then duplicated the entire model and added the edge loops in where needed so the model was primed to be smoothed to create my high poly model.

Improving The Bench

Whilst the bench does look good as it is, I knew there are some optimising I could do. Through some mentoring and other sources I used the original model I made and created a new low poly model.

After creating this, I then duplicated each piece made and added some edge loops in where needed so it could then be smoothed to create me high poly model.

Design a site like this with WordPress.com
Get started